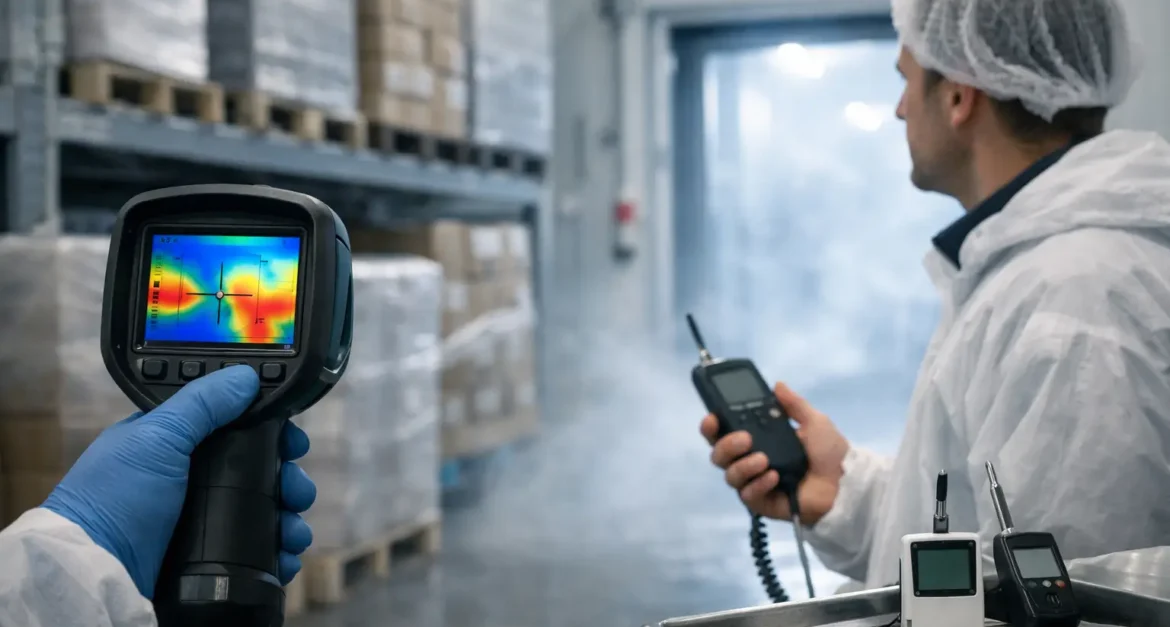
A refrigerated vehicle can display the correct setpoint on its controller while parts of the load area sit outside the acceptable product range. That gap is exactly why thermal mapping matters. It shows how temperature actually behaves across a vehicle, cold room or distribution environment, giving operators the evidence needed to protect sensitive goods rather than relying on a single display reading.
For food, pharmaceutical, medical and specialist commercial distribution, temperature control is not simply a vehicle specification. It is a managed process. Mapping identifies the areas most likely to warm, cool or fluctuate, so loading plans, monitoring locations and operating procedures can be designed around real conditions.
What is thermal mapping?
Thermal mapping is a structured assessment of temperature distribution over a defined period. Calibrated data loggers are positioned at multiple points within a refrigerated vehicle, trailer, cold store, warehouse zone or other controlled space. The recorded data reveals temperature variation by location and over time.
The objective is to identify hot spots, cold spots and areas affected by operational activity. In a refrigerated vehicle, this may include positions close to doors, the evaporator, side walls, the roof, floor and rear of the load area. In a cold room, it can include racking at different heights, corners, door-adjacent locations and positions close to cooling equipment.
This is different from routine temperature monitoring. Monitoring provides ongoing evidence that a journey or storage period stayed within the required range. Thermal mapping establishes where monitoring is most meaningful and whether the controlled environment performs consistently under representative conditions.
A properly planned study produces evidence that can support validation, risk assessment and quality assurance. It also gives operations teams practical answers: where should the most sensitive products be loaded, where should the control probe sit, and which activities create the greatest temperature risk?
Why thermal mapping is essential for controlled transport
Temperature-sensitive products do not all respond to risk in the same way. Fresh produce may suffer reduced shelf life after repeated warming. Frozen goods can be compromised by partial thawing and refreezing. Medicines, clinical samples and healthcare products may have strict labelled storage requirements, with deviations requiring investigation or product disposition decisions.
A vehicle may be capable of holding its target setpoint in stable conditions but perform differently when it is fully loaded, travelling through summer heat, making repeated multidrop deliveries or being opened at a busy delivery site. Without mapping, those differences can remain hidden until a complaint, rejection or compliance issue occurs.
Thermal mapping supports better control in several ways. It provides evidence for selecting data logger locations, confirms whether the refrigeration system distributes air effectively, and helps teams define safe loading configurations. It can also expose operational issues such as obstructed air chutes, poor pallet spacing, excessive door-open times or unsuitable pre-cooling practices.
For businesses operating under customer quality agreements or regulated procedures, this evidence is particularly valuable. It demonstrates that temperature control has been assessed systematically, not assumed. The exact validation expectations will depend on the product, customer requirements and applicable quality system, but the principle remains the same: know the risks before goods are on board.
How a vehicle thermal mapping study works
A useful mapping exercise begins with a clear protocol. The protocol defines the target temperature range, the number and position of sensors, the study duration, vehicle configuration, loading condition and acceptance criteria. It should reflect the actual work the vehicle is expected to perform, rather than an idealised test with no operational pressure.
Planning around the product and route
The required conditions must be established first. Chilled products, frozen products, controlled ambient goods and pharmaceuticals may all need different temperature ranges, tolerances and response procedures. A multi-temperature vehicle requires each compartment to be considered separately, including how bulkheads, doors and loading patterns affect air movement.
Route conditions also matter. A same-day direct delivery may create a different risk profile from a multidrop distribution run with frequent stops. Where practical, mapping should account for representative journey times, delivery activity and external ambient conditions. Seasonal qualification can be necessary where summer and winter conditions materially affect performance.
Positioning calibrated data loggers
Data loggers are placed throughout the controlled area to capture variation, not simply confirm the controller setpoint. Positions are selected to assess likely extremes, including the warmest and coldest areas, as well as locations where the product will routinely travel.
The quantity of sensors depends on the size and complexity of the space. A compact refrigerated van requires a different layout from a large articulated trailer or a high-rack cold store. The principle is coverage: there must be enough points to identify meaningful patterns with confidence.
Testing representative operating conditions
A static test has value, but it is rarely enough on its own. The study should consider the activities that challenge temperature control, such as pre-cooling, loading, driving, stopping, door openings and unloading. Where vehicles transport palletised product, the effect of a loaded configuration should be assessed because cargo can alter airflow substantially.
The equipment should be allowed to stabilise before the test begins. Throughout the study, the team records relevant events, including setpoint changes, door openings, fuel stops, loading activity and any refrigeration alarms. This operational record is essential when interpreting a temperature rise or unexpected fluctuation.
Reviewing the results and acting on them
The results are reviewed against the agreed acceptance criteria. The analysis should identify the minimum and maximum temperatures at each position, the duration of any excursion, the time taken to recover after door openings, and the relationship between external conditions and internal performance.
A hot spot is not automatically a failure, but it is a risk that requires a decision. It may be managed by changing the loading plan, improving airflow, relocating product, adjusting the setpoint within approved limits or using that position for less sensitive goods. If the environment cannot maintain the required range under representative conditions, the equipment or process needs corrective action before it is relied upon.
Factors that can distort temperature performance
Cold-chain control depends on more than the refrigeration unit. Good thermal mapping often identifies process weaknesses that can be corrected quickly, but only if they are understood in context.
Door management is a common example. Repeated openings during busy multidrop work introduce warm air and can affect the rear of a vehicle first. Fast, organised unloading, suitable delivery sequencing and clear responsibility at the point of handover reduce this exposure.
Loading practices are equally important. Overpacking, placing pallets too close to evaporator outlets or blocking return-air paths can prevent conditioned air from circulating. Products should be loaded in a way that supports airflow, while respecting segregation, stability and delivery order requirements.
Pre-cooling matters as well. Refrigeration systems maintain product temperature more effectively than they pull down warm goods. Vehicles and compartments should be at the required operating condition before loading, and products should enter transport at their specified temperature unless an approved process states otherwise.
External weather, vehicle condition, refrigeration maintenance and route delays all influence performance. Thermal mapping does not remove these risks. It makes them visible, allowing the transport plan and contingency procedures to address them.
Mapping vehicles, cold rooms and transfer points
Thermal risk does not stop when a vehicle arrives. A consistently controlled transport journey can still be undermined during collection, cross-docking, staging or final delivery. Businesses with high-value or tightly controlled products should assess the full movement, particularly where goods wait in ambient areas or pass through several handovers.
Cold room mapping focuses on similar principles but introduces different variables. Racking height, air distribution, stock density, defrost cycles and door location can create temperature variation across the room. A monitoring probe placed near the cooling unit may not represent conditions on the far side of the storage area.
Transfer points deserve attention because they are where control is often weakest. Clear collection readiness, short dwell times, appropriate packaging and confirmed receiving arrangements help prevent avoidable exposure. For time-critical goods, a transport provider should be able to coordinate these details rather than treating them as someone else’s problem.
When should thermal mapping be repeated?
Mapping is not a one-off exercise to be filed and forgotten. Reassessment should be considered after a significant change, such as installing a new refrigeration unit, modifying a vehicle body, changing compartment layout, altering operational routes or introducing a new product temperature requirement.
It should also be reviewed after maintenance issues, recurring excursions or customer concerns. Some organisations operate to scheduled requalification intervals based on their quality procedures and product risk. The right frequency depends on the criticality of the goods, the stability of the operation and the evidence already available.
Routine temperature records remain vital between studies. They provide journey-level traceability and help identify trends that could signal deteriorating performance. Mapping establishes the control strategy; continuous monitoring confirms that the strategy is working in daily operation.
Choosing a transport partner with proven control
A temperature-controlled carrier should be able to explain how it manages temperature, not merely confirm that its vehicles are refrigerated. Ask how temperatures are monitored, how data is retained, where sensors are positioned, how deviations are escalated and what happens if a delivery delay threatens product integrity.
For multi-temperature and time-critical work, the provider should also understand compartment separation, loading sequence, delivery windows and contingency planning. Full visibility requires more than GPS tracking. It means having usable information, clear accountability and a team ready to act when conditions change.
MT Logistics Group applies this controlled approach across refrigerated, frozen, ambient and multi-temperature transport. Real-time digital temperature monitoring, GPS visibility and traceable delivery processes help customers maintain confidence in every movement.
The most useful outcome of thermal mapping is practical control. When you know where risk sits in a vehicle or facility, you can load smarter, monitor with purpose and respond before a minor variation becomes wasted stock, a missed service level or a quality investigation.